Manually Creating And Adding Your OSF Project to the Collection
This tutorial covers the basics of developing and organizing your URE protocol manually, from creating an OSF Project to adding it to the URE Methods Collection.
Click the Sign Up button in the top right corner of the screen
Fill out the brief form
Follow the link in the account verification email you received
And you’re ready to get started!
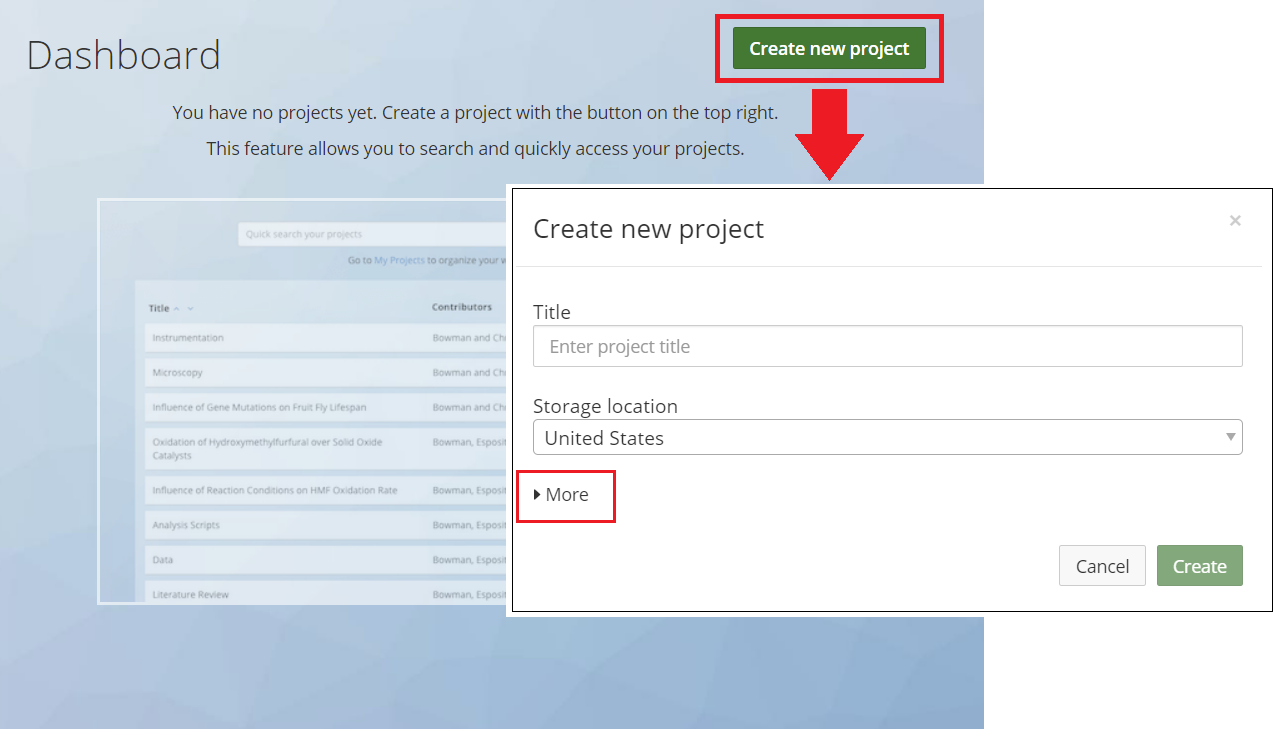
After creating and verifying your account, you’ll be brought to your OSF Dashboard – this is where all of your projects will appear. To make your very first project, hit Create New Project and enter a title.
Tip: You can click More to add a description for your project now, but you can add one or edit it later from the project’s main page.
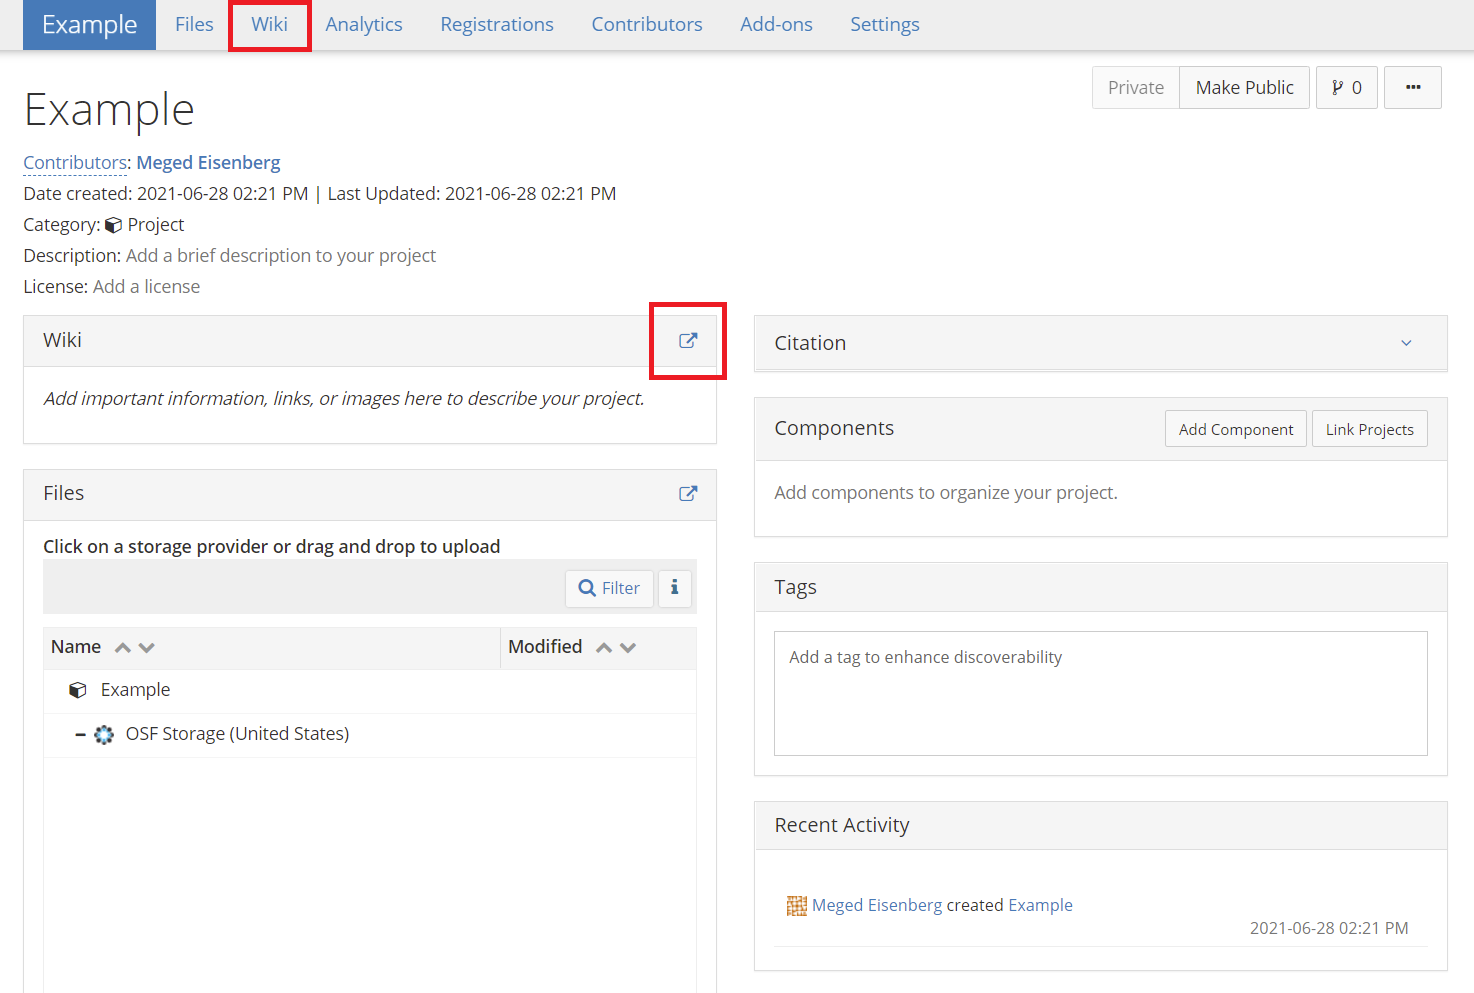
Once you’ve created your project, you’ll most likely want to start by developing an abstract for your protocol. The best place to do this is in the project’s wiki, which you can access by clicking the Wiki tab at the top of the page or the arrow above the wiki preview pane.
You can check out our templates if you’d like to get a sense of what kinds of features to attend to for your specific method(s).
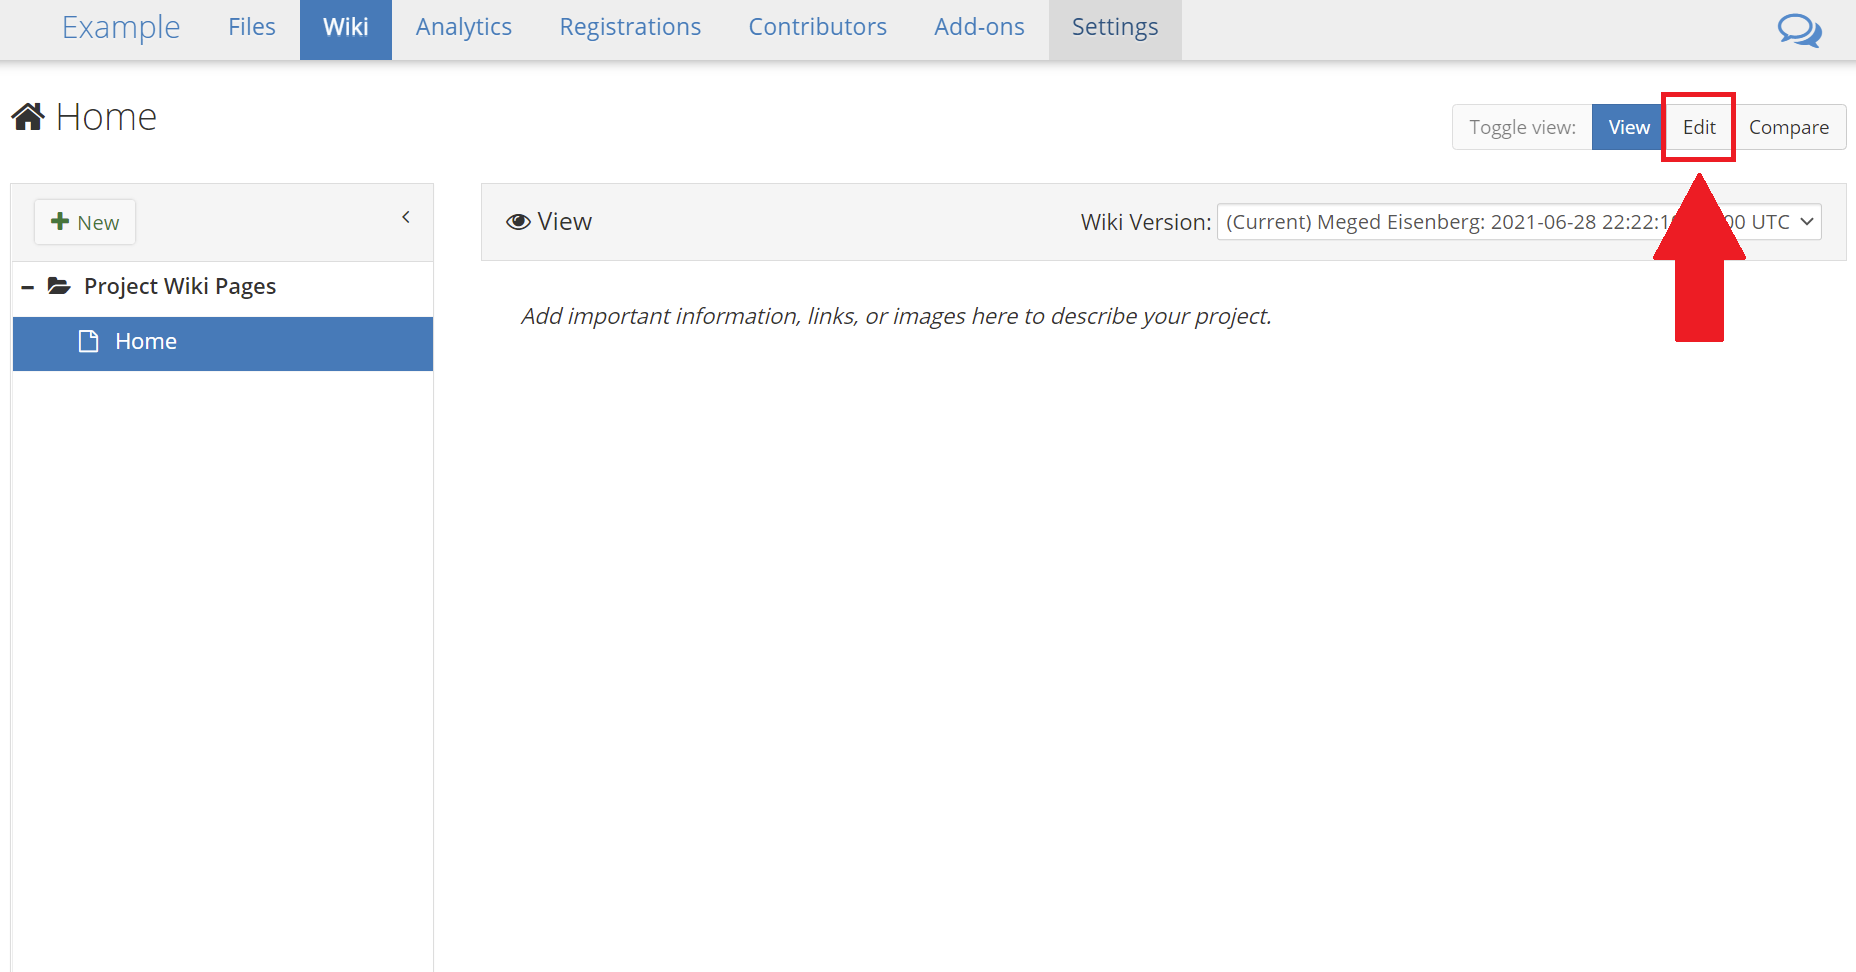
This is the main project wiki page. If it doesn’t automatically open to Edit View, you can toggle it by clicking the Edit button near the top-right of the page.
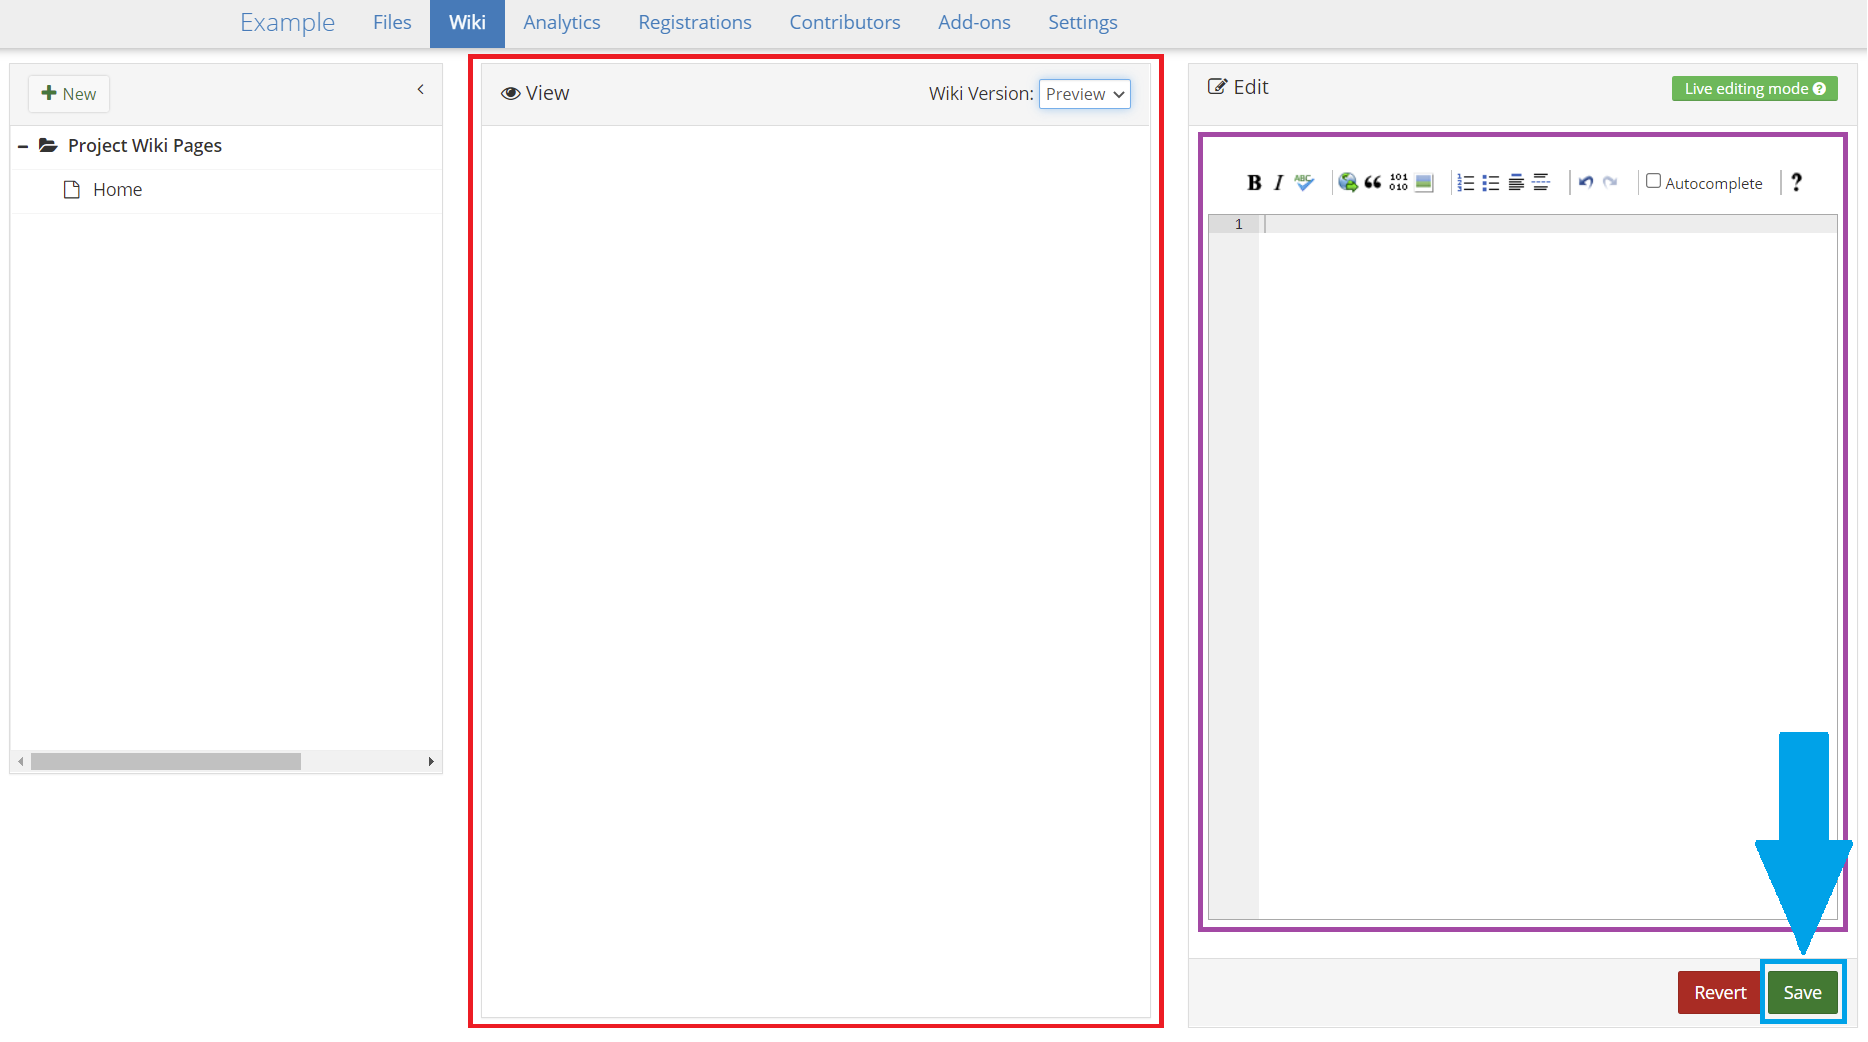
Once you’re in Edit View, you can type what you want to appear in the abstract in the Edit box on the right and a preview of the formatted text will appear in the View box on the left.
Tip: Don’t forget to save your changes when you’re done!
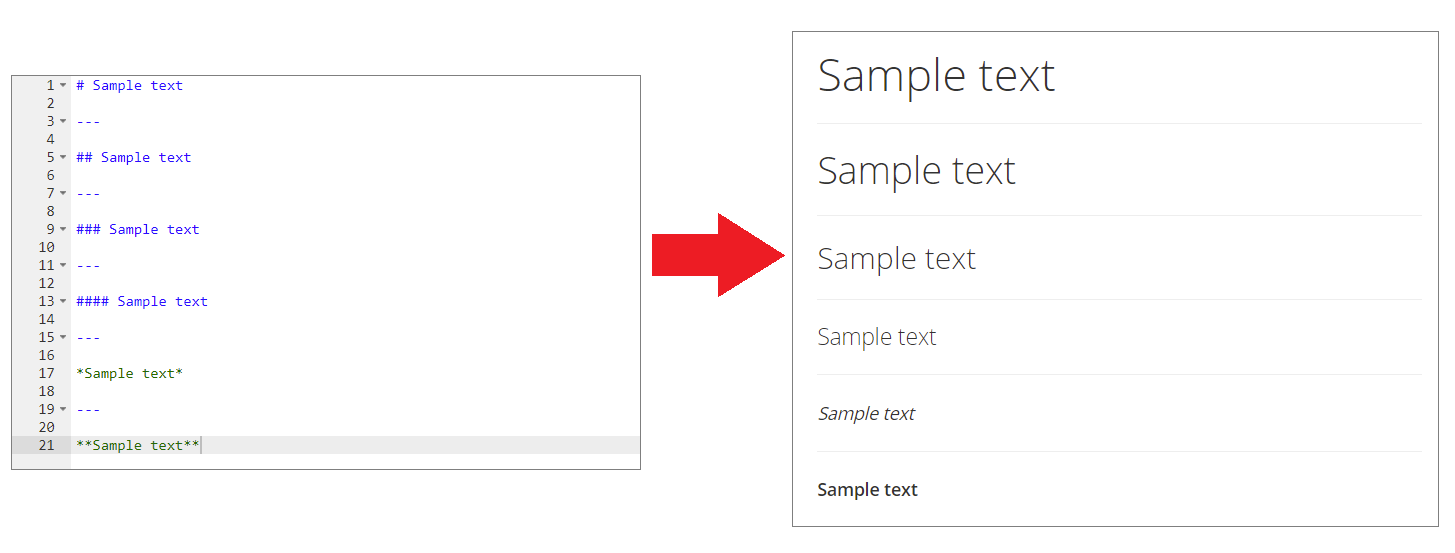
You can format text into various heading sizes and font styles by adding modifiers before (and sometimes after) the target text. The most common modifiers and the formatting they produce are shown above.
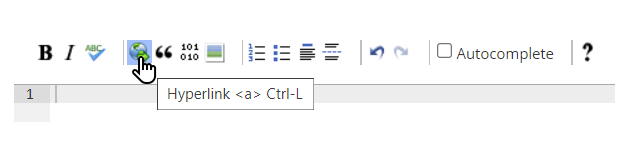
Most formatting options can be accessed via the toolbar above the Edit pane – simply hover over an icon to see what it does. Some functions have keyboard shortcuts, which will also display upon hovering.
For further details on these functions and more advanced features in the Wiki Editor, see OSF’s Edit the Wiki guide.
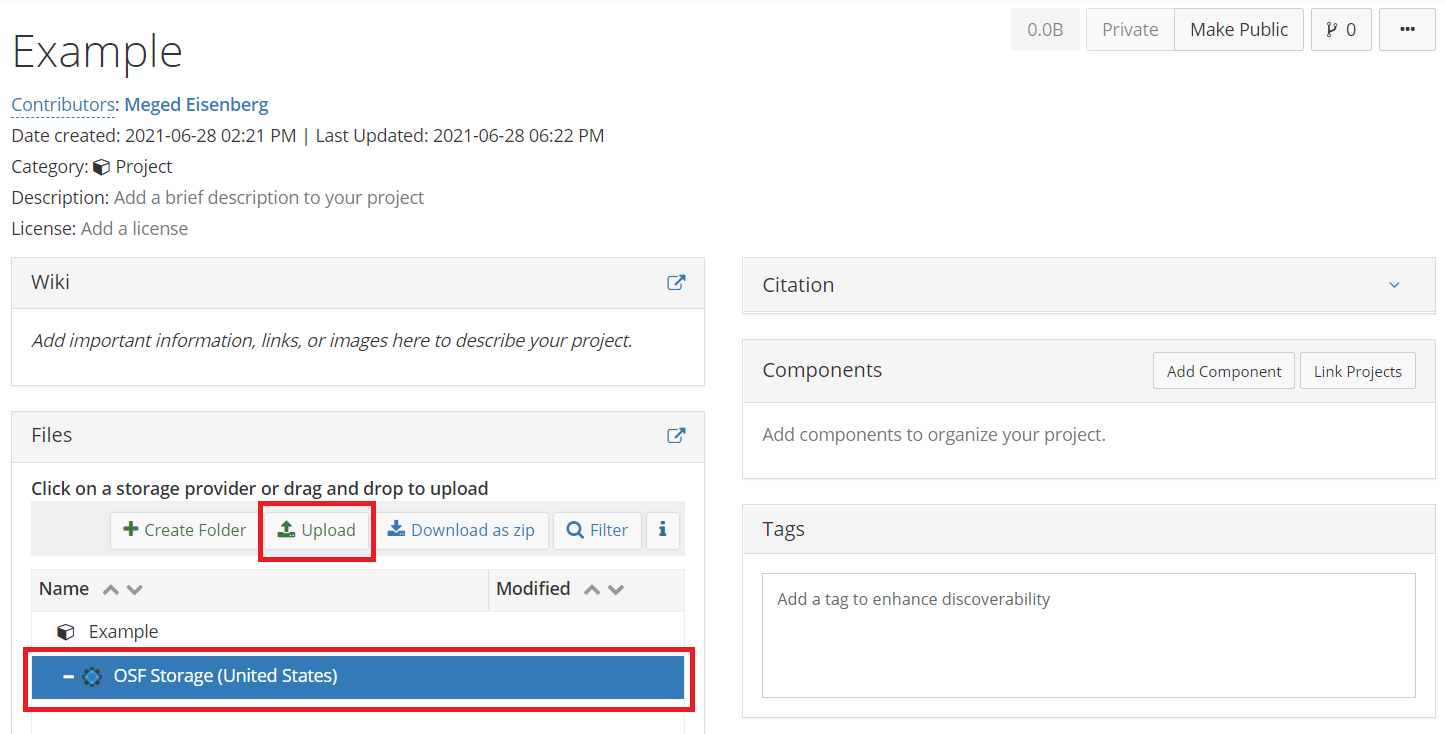
You may want to include files, such as codebooks or study protocol documents, with your project and reference them in the wiki. To do this, head back over to your project’s main page (after saving your work in the wiki!). Click on OSF Storage under the Files pane, and then hit Upload to select your documents. You can also simply drag and drop the files from your computer directly onto the OSF Storage tab.
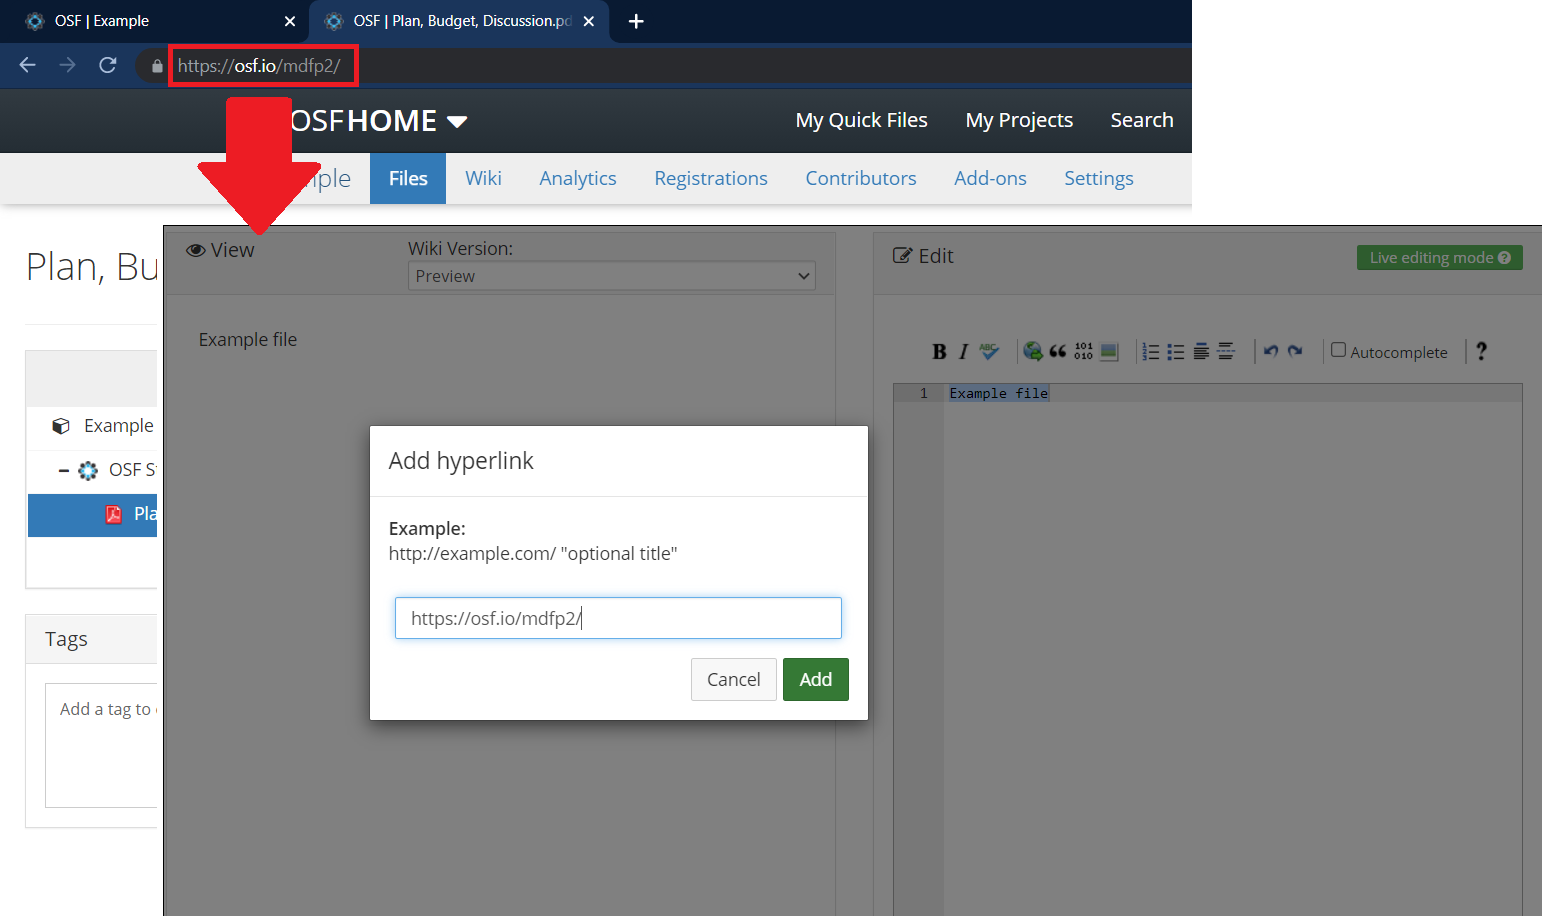
Then simply copy the relevant file’s URL from your browser bar, highlight the bit of text you want to have linked to the file, and use the Hyperlink function in the wiki’s Edit pane (or hit Ctrl + L).
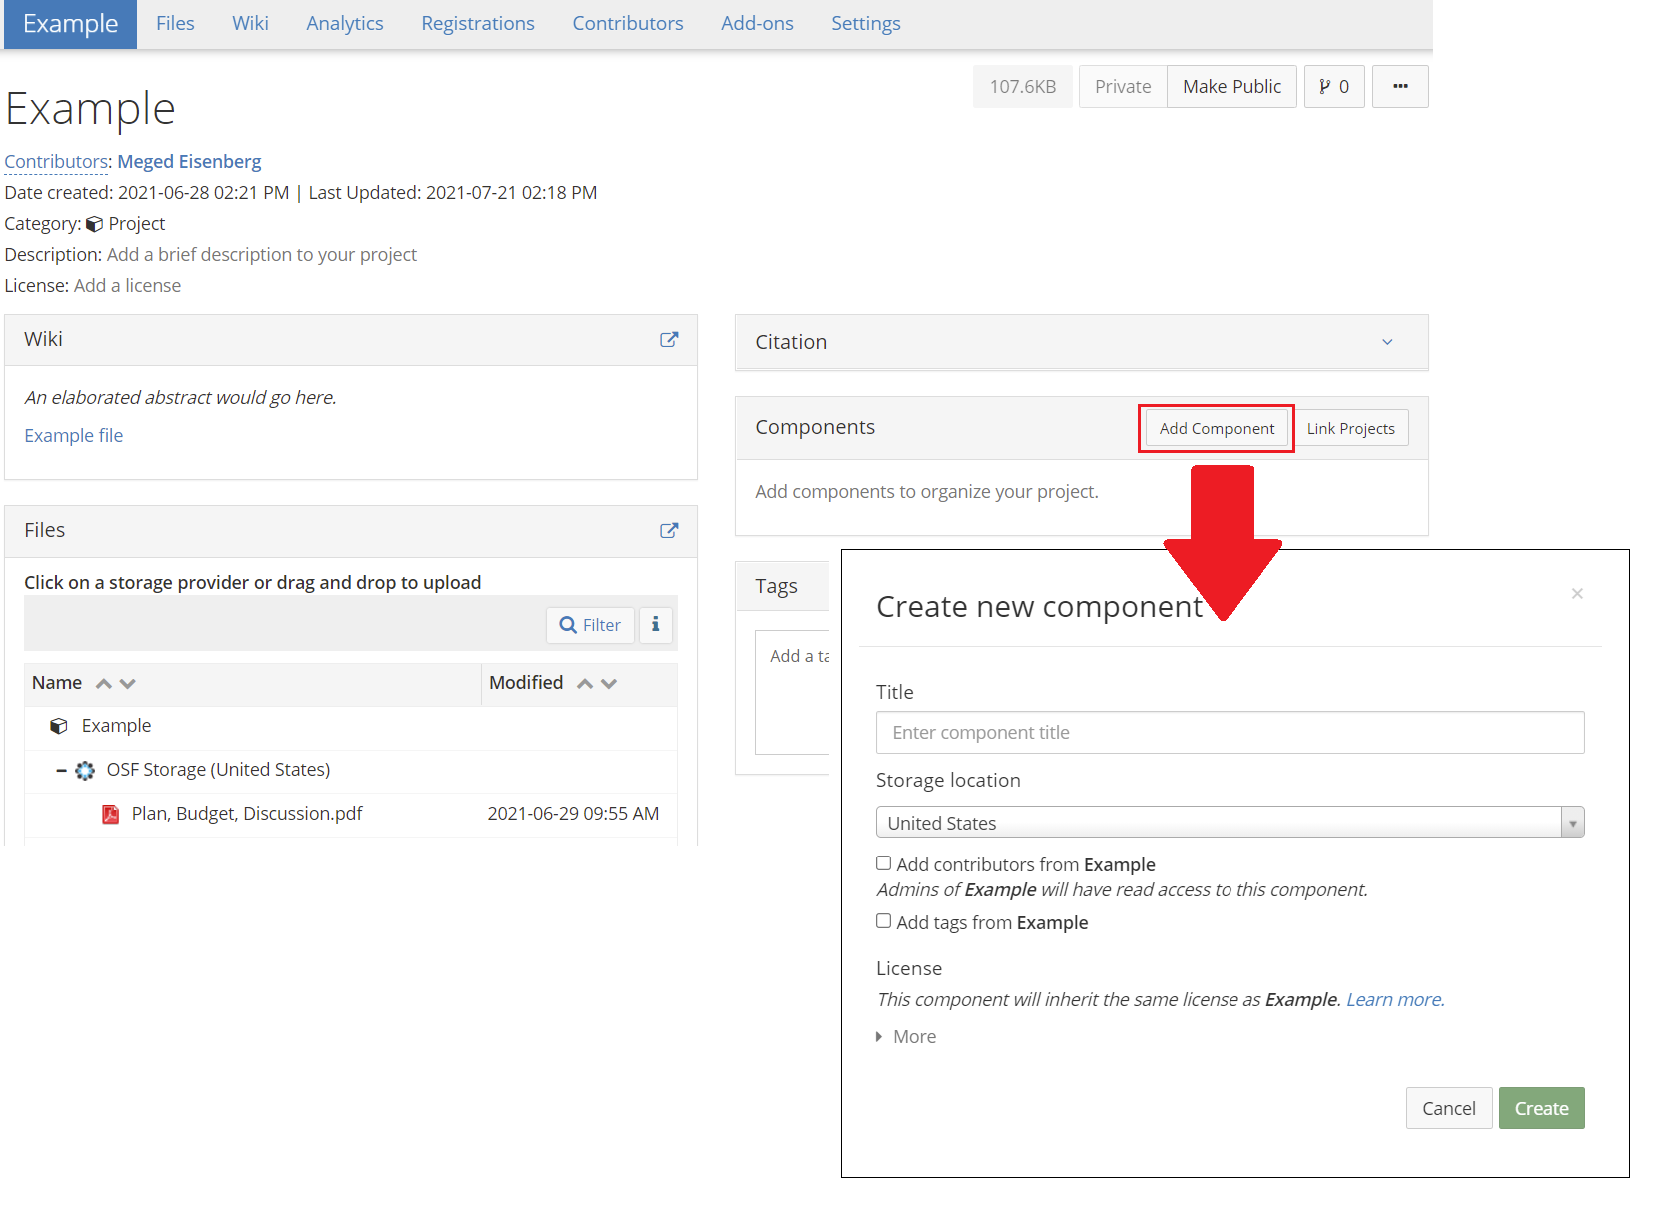
Many projects in the URE Repository consist only of an elaborated abstract, supporting documents, and a reference and/or link to an external publication where users can find additional details about the method – such as a journal article or book – in the project’s description. However, if you wish to include more information about specific aspects of your method within the Repository itself, you can do so by developing Components.
To add a Component to your project, simply hit the Add Component button found on the main page of your project. A box similar to the Create Project window will open; give your Component a name, select whether you’d like the Component to inherit the contributors and tags from the top-level project, and hit Create.
From there, you can develop your Component(s) just the same way you developed your abstract!
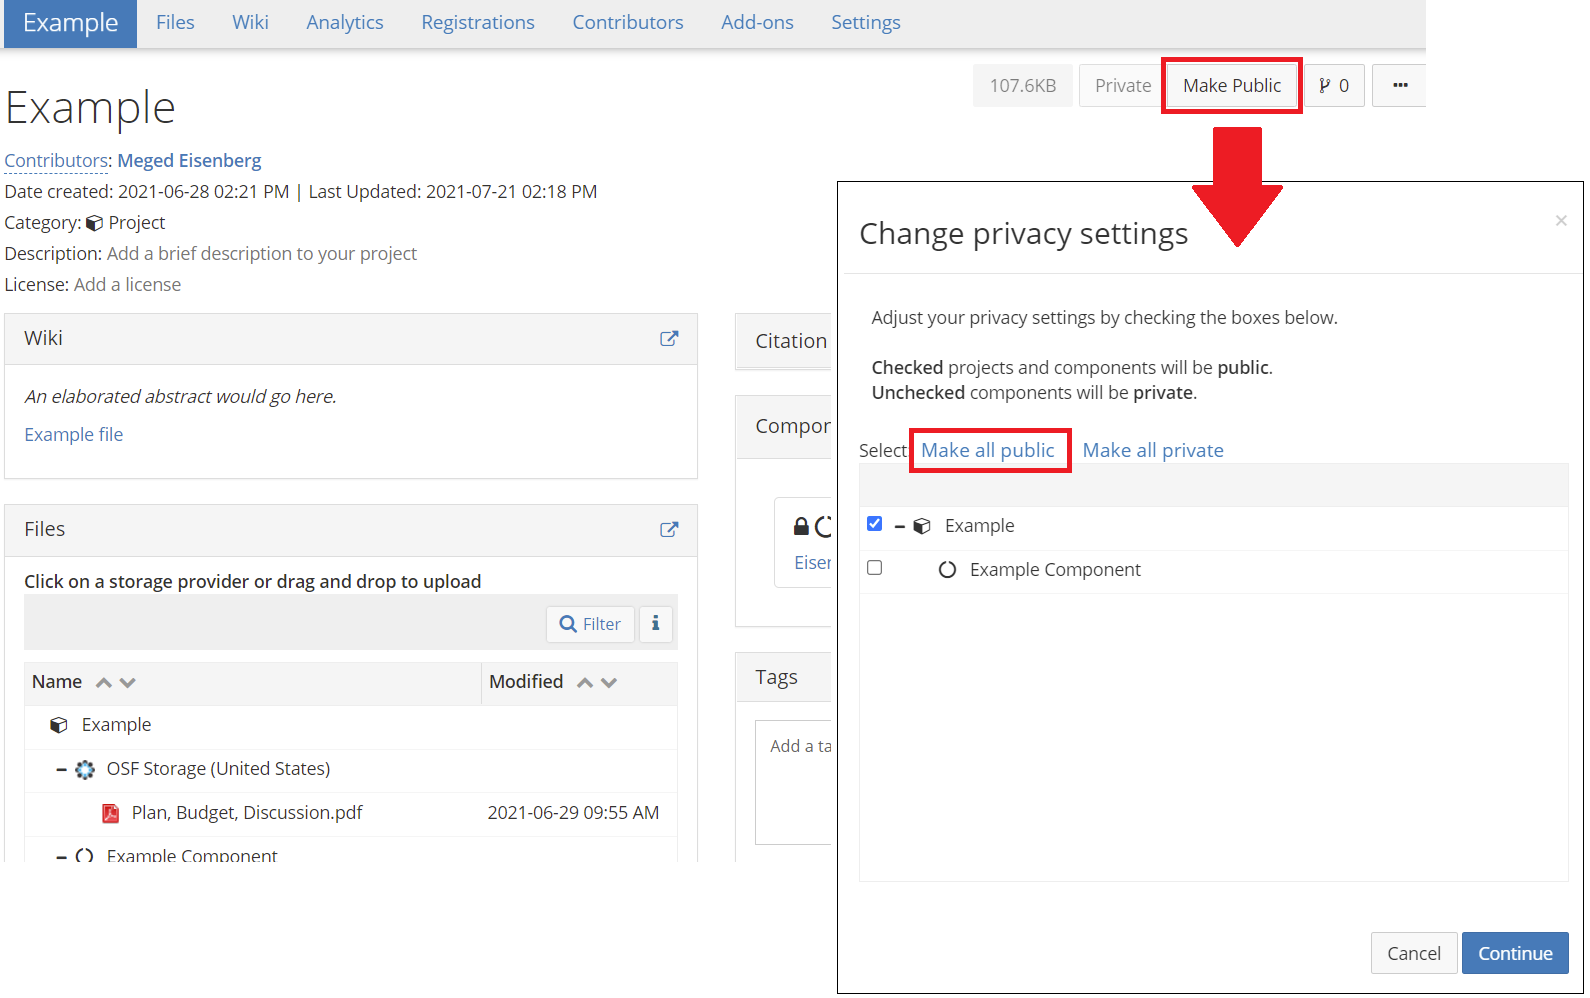
When you’re satisfied with your protocol and ready to add it to the Repository, the first thing you’ll want to do is ensure that everything is viewable to other users by making the protocol Public. You will still be able to edit your protocol and make it private again any time you wish.
Note: You can skip this step if your project does not include any Components; the top-level project will automatically become public when you add it to the Collection.
From the main page of your project, click Make Public. Then hit Make all public in the new window that appears, then Continue. Finally, hit Confirm.
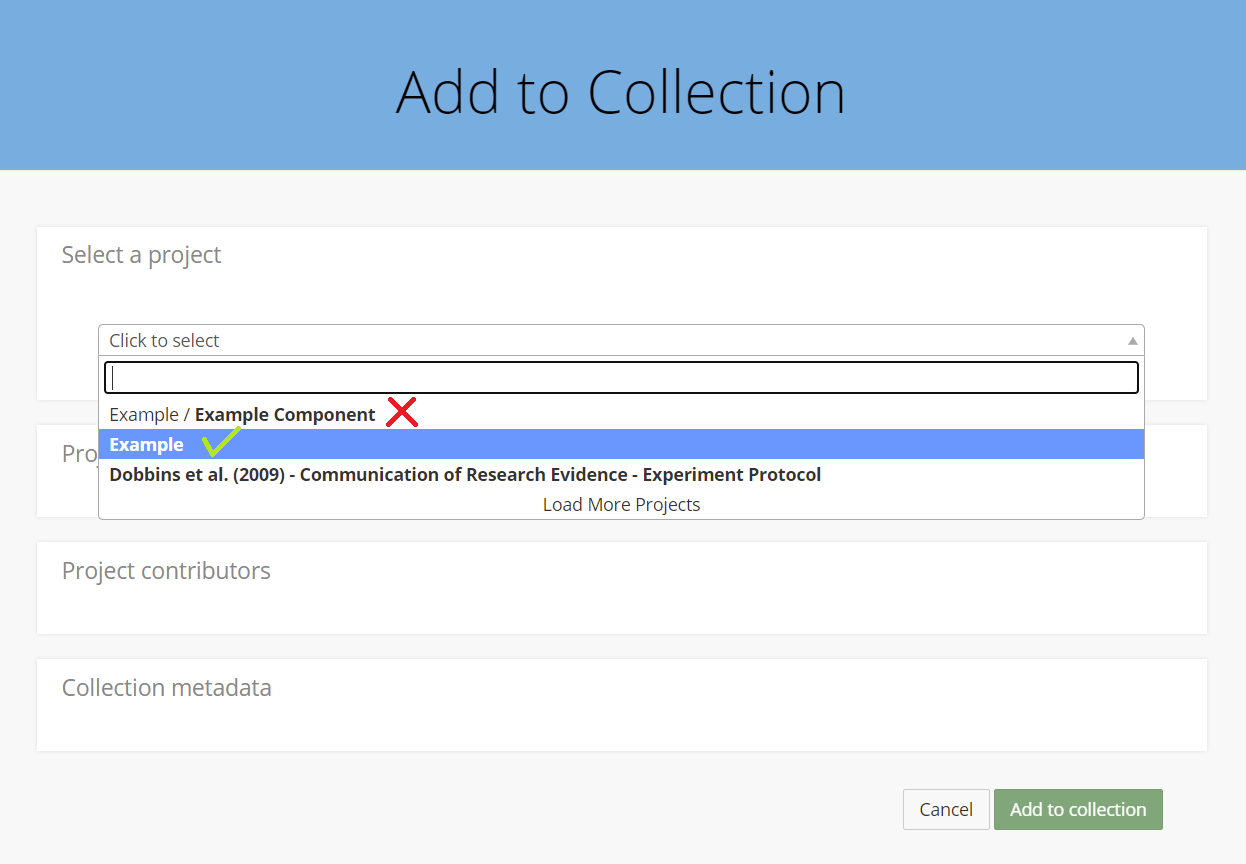
Next, head over to the URE Collection and hit Add to Collection at the top of the page.
From here, select the top-level project you’d like to include in the Repository.
We generally recommend that users do not submit Components to the Collection in order to minimize clutter – others will still be able to access your Components through your top-level project if you’ve ensured everything has been made public (see above).
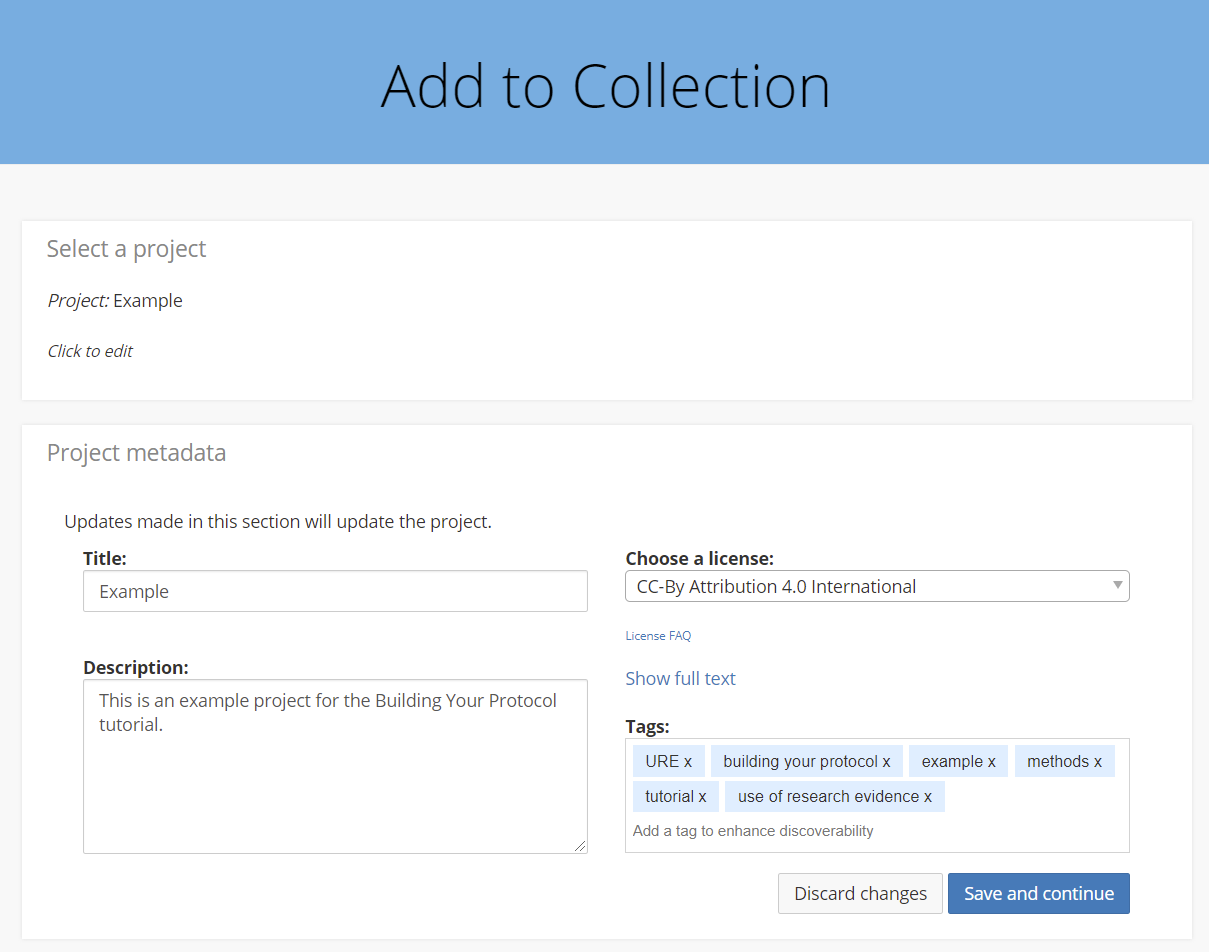
Next you’ll be prompted to include a description and keyword tags for your project (if you haven’t already) and select a license for your project. See our comprehensive Licenses and Copyrights page for more information on picking the right license for your work.
Tip: Projects with clear, robust descriptions and appropriate tagging are more easily searchable and, therefore, easier for other users to find!
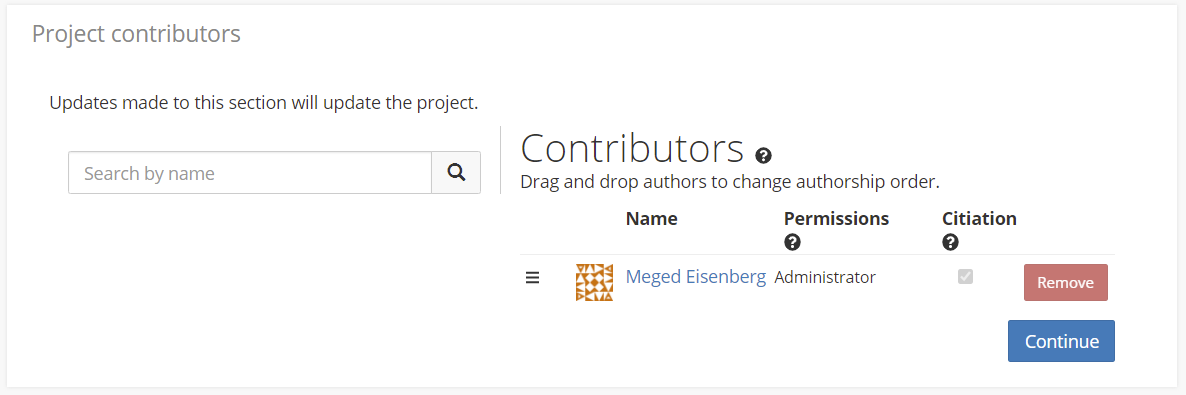
Then you’ll be prompted to finalize contributor permissions and which contributors will appear publicly as authors on the project (by checking or unchecking the Citation box next to each contributor).
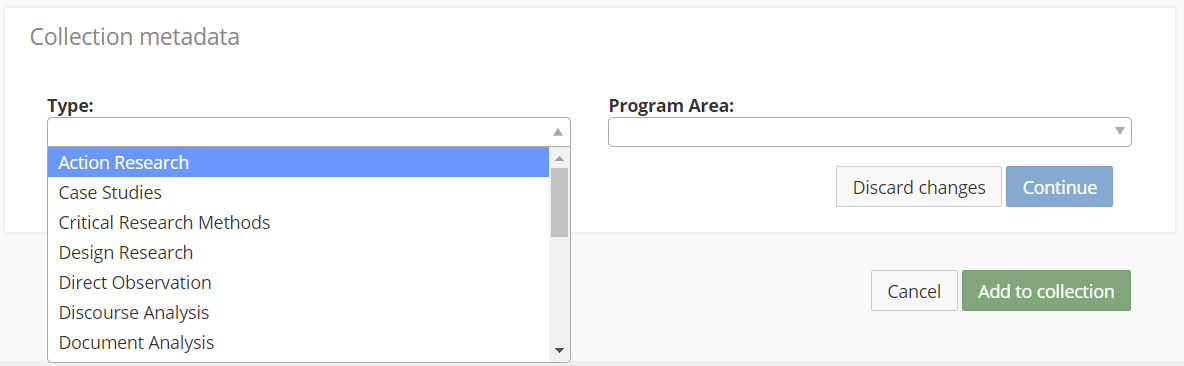
Lastly, you will indicate your protocol’s method type and the program area in which the method was developed and/or employed.
When everything looks right, hit Add to collection.
And that’s it – welcome to the Collection! We thank you for taking the time and effort to contribute your work to the URE Repository.